
How To Use a Rim Joist
This 7 days, we’ve already been reviewing components of the reconstruction of an end-unit townhome we caused Habitat for Humanity in the Sandtown neighborhood of Baltimore, MD. The major task we supported was installing another floor on the home, including installing engineered wooden I beam joists, and eventually installing a plywood subfloor.
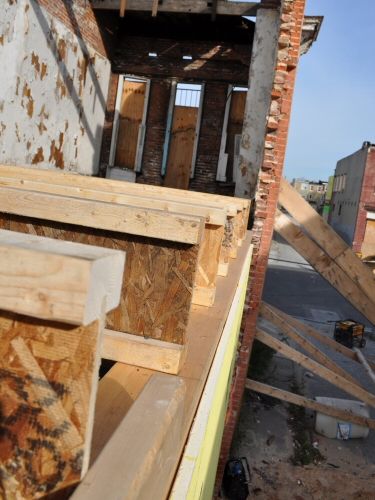
Between both of these project methods was the installing a good 2×10 rim joist on the finish of 2×10 engineered wooden I beam joists, and an alternative solution I beam joist blocking alternative that has been required on the advantage closest to the adjacent townhome in which a rim joist cannot be set up.
Rim board installation is usually fairly straightforward; however, the set up information vary by the components chosen for the joists and rim plank. For example, some rim table / joist combinations need 8d/10d nails, while some might dictate 12d/16d nails. Follow manufacturers directions for the materials you’re using and become sure your answer meets the program code in your town. Always consult with a professional because of this type of function. You want the framework of your property to last permanently.
Wooden Rim Joist Set up
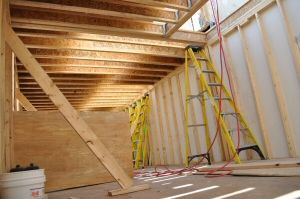
Have a look at this photograph of the engineered wooden I beams set up on the second flooring. We set up these beams 16 inches on middle and set exactly 1.5 inches from the edge of the very best plate of the initial floor wall to permit space for the rim joist to be installed. It’s worth noting these joists are usually nailed to the very best plate of the walls on both sides. We utilized a Porter Wire Framing Nailer with 3″ 10D circular mind framing nails. Nails are usually powered one on each part of the vertical person in the joists, down through underneath flange in to the top bowl of the walls.
Once you install the rim joist, it really is essential that the wooden I beam joists are usually vertical rather than leaning or twisting in virtually any path. These joists are created to bear load only once set up vertically, and the rim panel plays a significant role keeping in mind these joists from twisting, and becoming fragile. When plywood is put into the surface, following the rim joist will be installed, the solution can be an extremely solid and well-supported construction.
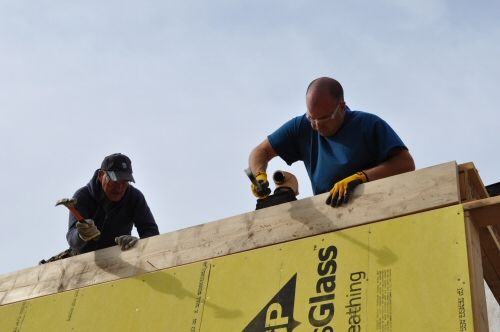
Reduce and place the initial rim board set up. Chances are that the rim plank should be installed in several sections (one little bit of lumber will never be long good enough). Butt joints ought to be made between wooden I joists (instead of on them) in order to avoid nailing near to the advantage of the joist best or base plate and splintering. Once the rim table is in place, it is possible to manually drive several nails into the wooden I beam joists to carry it set up.
The rim joist ought to be toe nailed in to the best plate below utilizing the appropriate nail dimension (likely 12d or 16d nails, according to the materials). Toe nailing is achieved by nailing through the facial skin of the rim panel diagonally down into the very best of the walls plate. The idea is somewhat much like blind nailing hardwood flooring.
A minumum of one nail should be set up through the rim plank in to the top and base of every I beam joist. Some I joist producers may enable two nails. Lastly, when after that plywood is installed at first glance, subfloor nails (usually 8d) ought to be powered every six ins from the plywood into the rim joist. Jointly, this nailing mixture creates an extremely strong structure.
Rim Joist Blocking Substitute
Privately of the house near to the present townhome, we were not able to set up a rim joist since it would be difficult to nail the table in place. (There is absolutely no usage of the exterior of the walls). To achieve an identical benefit, we installed wooden I joist blocking between your existing joists. The purpose of the wooden blocking is to keep carefully the wooden I beam joists flawlessly vertical, therefore it is important they are perfectly in shape.
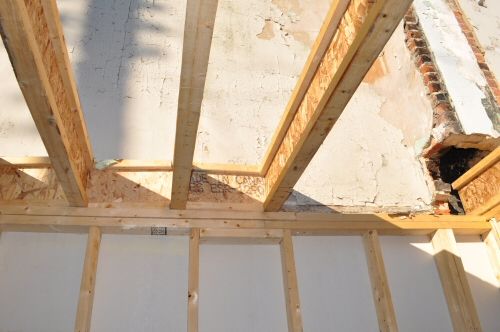
Remember that this blocking needed a lot of dimensions and cuts, and really should be safely fastened to the very best plate of the walls, the joists on either aspect, also to the plywood at the top (via nails every 6 in .). It isn’t an ideal solution due to the work involved, nonetheless it works to carry the I joists set up. Check with your regional inspector / building program code to notice if that is an acceptable remedy in your town.