
How to Use a Plywood Subfloor
Earlier this Saturday the crew at One Project Nearer spent your day with Habitat for Humanity Baltimore, rebuilding a residence in the Sandtown section of Baltimore Town, Maryland. We shared your day with twelve volunteers, working mainly on structural the different parts of the home, including installing flooring joists, installing a 3/4 inches plywood subfloor, adding fire stops to initial and second floor wall space, and adding additional plywood sheathing to the surface of the home.
Habitat offers a great possibility to learn construction strategies that apply to your personal DIY tasks, while at exactly the same time assisting others in need. We have been huge supporters of Habitat’s objective, to supply safe, dry, and inexpensive housing to needy people and households.
In this post, we’ll cover up the installing a 3/4″ plywood subfloor, including ideas and images from our use Habitat. Much like all major construction tasks, you should look at consulting a expert before trying a job such as this on your very own. You can find unique challenges atlanta divorce attorneys plywood subfloor set up, including important developing codes particular to your neighborhood that no article could completely deal with.
3/4 In . Plywood Subfloor Preparing: Joist Set up
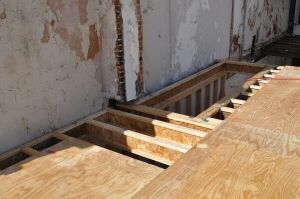
The next floor of the house is made with 2 x 10 wooden I-joists (joists that resemble metal I-beams and so are 9.5 inches thick), 16″ on center and spanning 13.5 feet. These joists are more powerful than comparable wood joists, give a 66% bigger nailing surface area for the plywood subfloor (2.5 inches rather than 1.5 inches) and so are more uniform than traditional lumber joists. Nevertheless, they need to be installed and kept vertical to make sure they don’t twist, which would considerably weaken them. Vertical set up may be accomplished through careful installing a rim joist, and when necessary, blocking between your joists themselves. Furthermore, these joists aren’t as secure in a fire. Strong joists take more to burn off through, and can provide structural support more time. We recommend setting up a sprinkler system in the event that you create a house using wooden I joists. (Notice our wood joist evaluation.)
Afterwards this week we are showing wood I-joist set up, both with a rim joist, and without, in times in which a rim joist can’t be installed because of the place of the wall close to an adjacent home.

It helps during set up if the joists are usually installed precisely 16 inches on middle through the entire floor. At periods it may be essential to go shorter with this measurement, however when this occurs, the plywood should be cut to support the shorter length. In no way go longer if you don’t have got rechecked the spanning length on the plywood and joists you’re installing, as this may create a weak place in the ground.
At 16″ on middle, you will have 7 joists under each little bit of plywood, and each item will result in the center of another joist. The biggest market of the initial joist from the finish should be installed 16 ins on middle from the advantage of the finish of the house, instead of the center of the joist, so the plywood can begin at the edge of the home.
Set up is simpler in a Squared-up Home
Prepping for a subfloor set up happens long before you’re in fact laying the plywood. If the home has gone out of square, it’ll ensure it is exceedingly difficult to obtain the plywood directly on the joists. The wooden i-joists tend to be more forgiving than conventional joists because they possess a wider nailing flange. Be sure that the foundation will be square, that the initial floor walls are usually square, and that the joists are usually square. Errors have a tendency to substance as you sort out these steps. Ensure that your contractors are cautious through each phase.
Methods to Install 3/4 Inches Plywood Subfloor
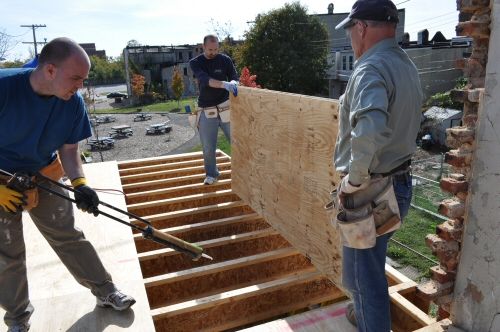
Step one 1: Obtain the plywood to the proper level of the home. Assuming a remodel, that is going to involve getting the plywood to the positioning by hand, instead of assistance by way of a crane. Be cautious! A 3/4 in . sheet of plywood weighs approximately 75 pounds. Don’t stack an excessive amount of plywood on a single group of joists and overload them.
Step two 2: Gauge and dry-set the initial piece. Your goal would be to possess the plywood end specifically half way over the joist, so the new plywood can begin with this spot. (There exists a picture of the below.) Dry-setting is essential. It is exceedingly essential that the initial whole type of plywood bedding be perfectly direct and square. Each subsequent little bit of plywood depends on the initial piece being installed properly. Should you choose this correctly, you’ll have a lovely plywood subfloor.
Tip: plywood bed linens are always set up with the grain over the joists. Spanning rankings for plywood and OSB derive from this assumption. Stagger adjacent bed sheets so they do not start exactly the same joist.
Step three 3: Raise up the plywood and place construction adhesive over the joists. Liquid Nails for Subfloors is really a common product because of this work. This is doable for those who have a caulk gun created for subfloor installation just like the one demonstrated below.
Step 4: Established the plywood on the structure adhesive with the tongue oriented towards the groove of the adjacent sheet. You most likely won’t have the ability to press the plywood into location by hand. In the event that you’ve positioned the plywood correctly, it must be sitting half-way on the joist, right close to the adjacent item, as proven below.

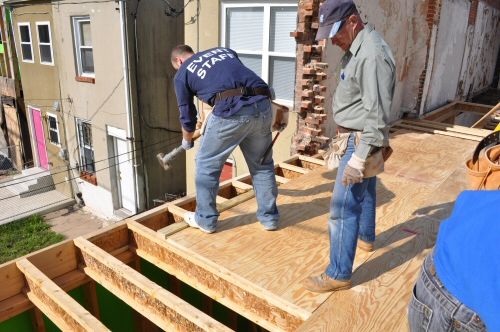
Stage 5: Tap the subfloor into location. That is best achieved utilizing a sledge hammer and a tapping block. For best outcomes, you’ll move backwards and forwards over the whole sheet to make sure a good fit. Don’t skip utilizing the block. You’ll end up being hammer on the tongue advantage of the plank. The sledge hammer will quickly mar the plywood subfloor rendering it difficult to in shape another sheet into location.
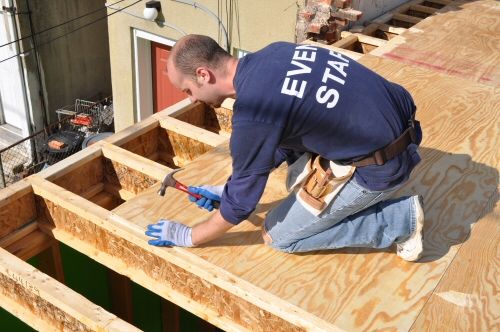
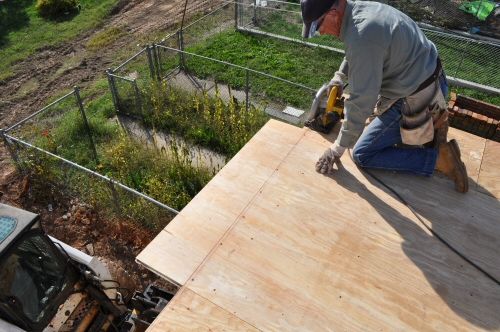
Step 6: Be sure the sheet of plywood is usually square and restricted against both sides. After that, utilizing a hammer and nail to tap in two fixed nails, one at each part. You should depart these nails about 3/4″ from the plywood to create pulling them simple if everything isn’t correct. The theory is to obtain the plywood fastened and consider one last appear before you fasten it totally.
It’s vital that you note that when setting up the plywood linens, usually do not nail within 10 in . of the medial side closest to the tongue Before adjacent sheet will be hammered in. In the event that you tighten the plywood right down to the joists close to the advantage, it is a lot more difficult to set up the sheet. You can observe in the image below that the arranged nail ought to be placed about 10 ins off the tongue advantage of the table.
Keep in mind, plywood only includes a tongue and groove on the sides, not really on the edges, since these will undoubtedly be nailed in to the joist.
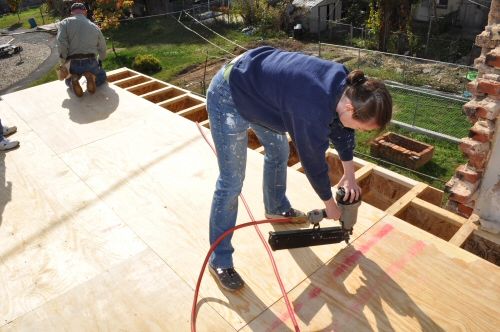
Step 7: If everything looks great, work with a pneumatic framing nailer to fasten the boards to the joists. In this set up, we used Portable Wire’s Round Mind framing nailer. We choose 2 inches subfloor nails with reverse threads and coated inside glue. Place a nail every 8-10 in . at first glance. Remember never to nail towards the final 10″ of the tongue side before following sheet is installed. It is possible to snap a chalk series across the joists to create nailing simpler.
You can view in this image that the plywood bedding creating the subfloor in this home are tightly joined jointly. This can make installing surface area flooring a easier task.
Action 8: Trim the advantage of the ground by snapping a chalk collection and slicing with a circular noticed. We utilized a DeWALT 10″ circular noticed for the work. Make sure no-one is standing below therefore the pieces can drop freely to the bottom.
Phase 9: At this stage, the plywood subfloor will be full. Because this floor could be exposed to climate prior to the second ground and roof could be installed, we protected it with Zinsser Shellac. Shellac assists temporarily prevent drinking water penetration at first glance and sides of the plywood. It is very important make certain the shellac addresses the edges.
Shellac isn’t a long term treatment for avoid the plywood subfloor from delaminating beneath the elements; however, it can provide some additional climate protection for a while, and will probably be worth the relatively little money and time investment for a task like this where it may be several weeks prior to the flooring is under roofing.
Another approach is always to completely cover up the project with huge tarps among efforts.