
Repair a Drywall Bulkhead (Soffit) for Cabinet Set up
In the event that you’ve already been following alongside our cooking area remodel, you’ll understand that a couple of months back we had a need to modify the prevailing soffits to support the new cabinet design. We hired among our close friends who doubles as a handyman to change three drywall soffit sections.
Among the larger modifications to support new floor-to-ceiling cupboards needed extending a soffit 12 inches right out of the original depth (that was already about 13 in . for the prevailing wall cupboards) and adding about 3 ins to the right aspect to accommodate the excess width. Everything went clean and the soffit appeared great, nonetheless it didn’t very work with the cupboards.
The issue was that the initial soffit wasn’t 100% square, and the ground under the soffit wasn’t either.
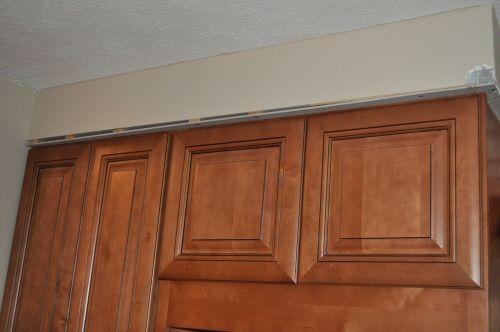
This normally isn’t an enormous problem when installing normal hanging cabinets, as hook error is tough to notice, and the cupboards can simply follow the contour of the soffit. But with floor-to-ceiling cabinets, the mistake was very apparent. The gap on the still left part of the cupboards was about 3/4 in .. On the right, it had been about 1/4 inches, leaving an extremely visible 1/2-in . slope all over the upper advantage of the cabinet.
Sadly, with this kind of cabinet, no molding would suit at the very top, and besides, molding might appear downright ugly. We’re able to have shimmed underneath of the cupboards, but with a 1/2″ mistake to overcome, it appeared like this choice would create a possibly non-square look between your two cupboards.
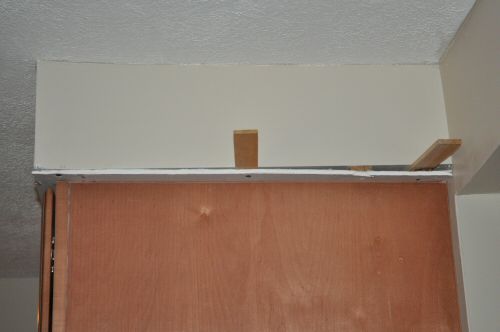
The only real option that made feeling was to re-type the soffit. Our authentic idea was to eliminate the complete soffit and devote a fresh one, but our handyman developed an improved solution: shim a 1/4″ little bit of drywall beneath the existing soffit, established it at the slant of the cabinet, and re-mud the 1/4 inch piece set up. Right here’s what it appeared as if, in pictures:
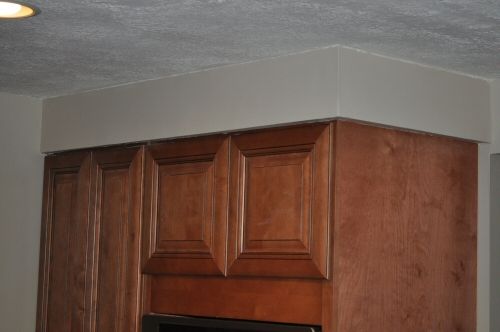
Drywall Soffit Repair for Flooring to Ceiling Cupboards
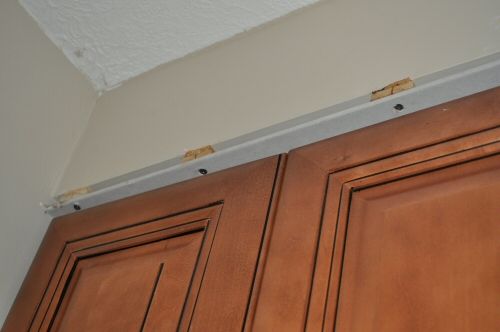
Right here’s a go that presents the 1/4-inches drywall piece match place. You can view on the right a bit of the prevailing mud needed to be removed to find the 1/4-inch sheet set up. But the remaining way, several shims were needed. This 1/4-inch little bit of drywall will be fastened completely round the perimeter and in the industry to the soffit above.
Right here’s a close-up of the screws keeping the drywall set up at the perimeter.
And right here’s the proper aspect of the cabinet prior to the shims were lower.
Right here’s a go after the part bead was set up, and the first layer of mud is used. Note that in the event that you mud with the cupboards installed, you will be completely affixing the cupboards to the walls.
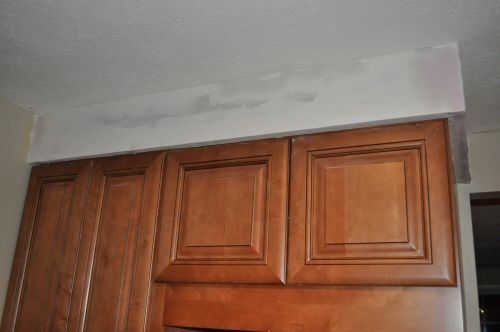
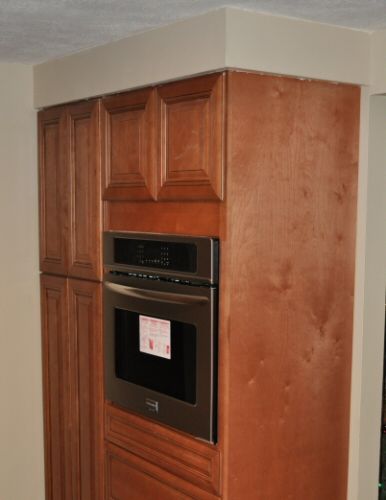
And right here’s what the soffit appears like today… Even though the wall cooker is sitting set up, it in fact isn’t installed yet.
Overall, this remedy worked much better than a huge molding, because the outlines are crisper between your cabinet and the soffit. The very best component is, we avoided getting rid of and replacing the prevailing soffit, which would have already been a lot more work.